The following blog post is purely for my own purposes, to document how to install Oracle XE 10g on Ubuntu 10.10 Server as a VM under VMWare Fusion 3.1 on Mac OS X 10.6.6.
These instructions are gathered from numerous internet resources and much of the credit must be given to these authors for their superb guides. The main difference for my guide is the inclusion of screenshots which I prefer over text or video, and the occasional fix where the original instructions didn’t work for me. Reference to the external authors is given throughout this article.
Installing Ubuntu 10.10 Server on VMWare FusionOpening credit must go to Ted Wise for his
XE on Mac guide. Ted’s guide is very indepth detailing the exact options for installing Ubuntu’s JeOS 8.04. Ubuntu doesn’t appear to have a JeOS download for 10.10 so my instructions are the Ubuntu 10.10 Server .iso instead.
First download the Ubuntu “i386” 10.10 Server edition as the Oracle XE .deb package downloaded later is “i386” too. I’m a little unsure why, but there doesn’t appear to be a 64bit version of the i386 ISO for Ubuntu, but there is an Ubuntu amd64 server release for 10.10. While the amd64 version will run in VMWare Fusion, later on attempting to install the Oracle XE .deb package, it will complain it’s only for the i386 platform, which makes the amd64 Ubuntu unviable.
There’s obviously something I don’t know about the Ubuntu supported platforms and the relating ISOs.
iiNet (local Aussie ISP) provides a handy
mirror.
Once downloaded open the VMWare Fusion. From the menu select File -> New which opens the New Virtual Machine Assistant wizard:
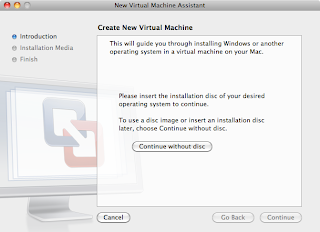
Select the “Continue without disc” button which opens the Installation Media page in the wizard:
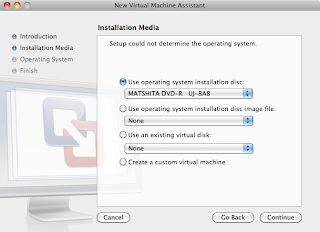
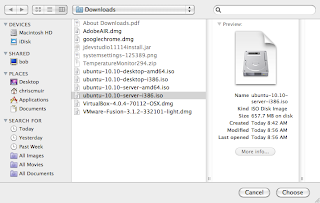
Select the “Use operating system installation disc image file” radio button. This will open a select file dialog where you select the Ubuntu 10.10 Server i386 iso:
Presenting the following options in the previous dialog:
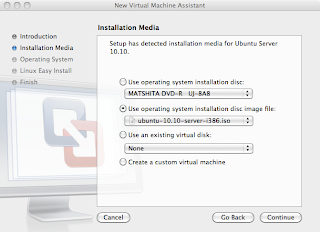
Selecting “Continue” presents the Operating System page. By default Linux and Ubuntu should already be selected under the respective Operating System and Version options:
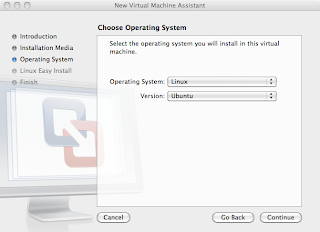
Selecting “Continue” presents the Linux Easy Install options:

Note in the above picture we unselect the “Use Easy Install” option as this will skip many of the options we want to configure when the Ubuntu installation starts in the VM. Selecting the “Continue” button will present the Finish page:
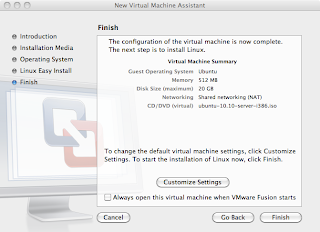
The default options for the VM are fine. However you can click the “Customize Settings” button to change them. Note on selecting either this button or the Finish button will display a save dialog asking you to name and place the VM file on the OSX file system. The default location appears to be /Users/(your username)/Documents/Virtual Machines:
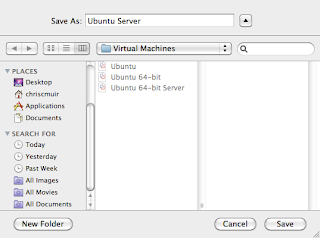
Note in the above picture I already have a number of other Ubuntu VMs that were previous trials.
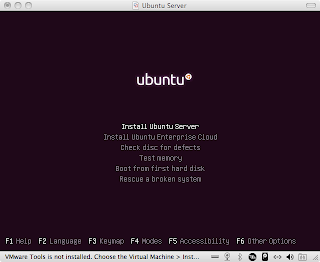
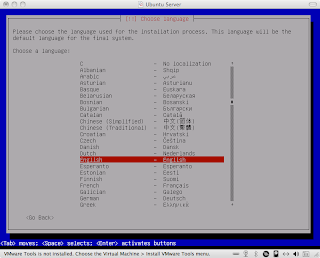
Once you press Save the VM will start and the Ubuntu installer will flash through some startup screens, quickly arriving at the first option to select English as the preferred language:
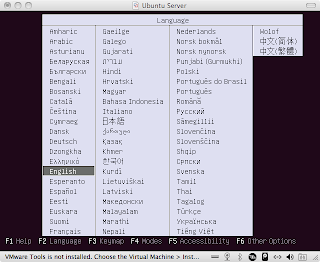
At the next screen select the “Install Ubuntu Server” option:
For whatever reason we’re prompted for the language again, “English damn you, English”:
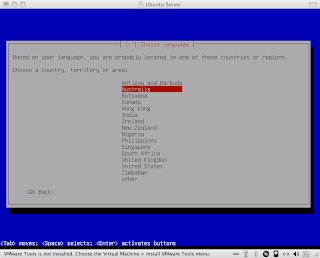
Then select your country:
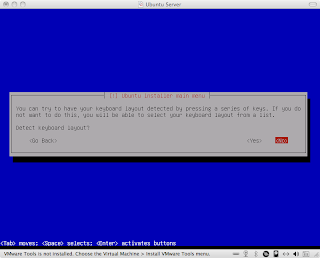
Select No at the “Detect keyboard layout” option:
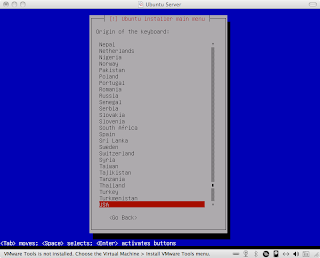
Select USA on the “Origin of the keyboard” screen:
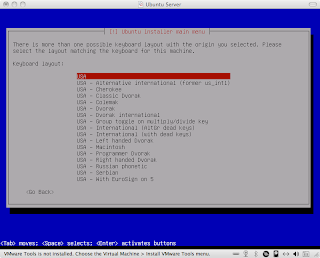
Wow, Ubuntu loves it’s keyboard options. Select USA at the “Keyboard layout” screen:
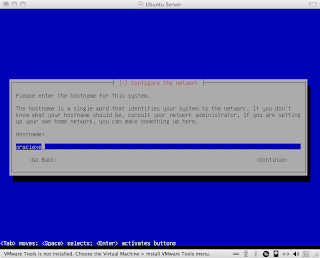
Change the hostname to something more suitable at the Hostname prompt on the next screen, such as “oraclexe”:
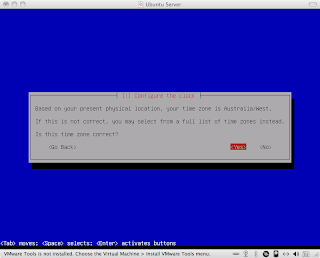
At the timezone prompt assuming the right default has been picked, press Yes:
The next set of steps owes all its credit to
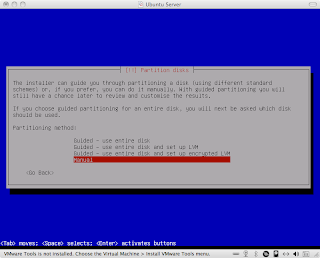
Ted Wise’s instructions. As Ted notes Oracle XE will require a Linux swap partition twice the size of the available RAM. This can be done post install but it’s easier done now through the install screens with no typing required. The first screen titled “Partitioned disks” select the Manual option:
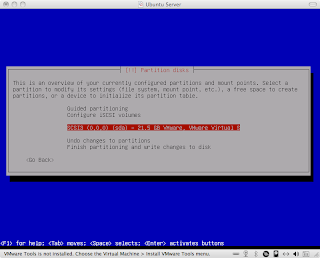
On the next screen select the SCSI3 option representing the VMWare disk available to the VM:
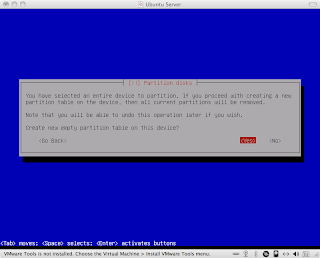
The screen will warn you that we’re going to drop and recreate the partition, which we select the Yes prompt:
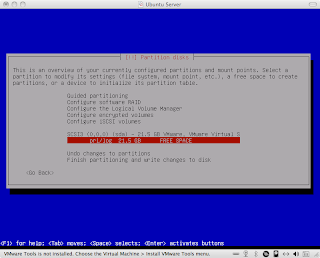
This returns to the previous screen where under the SCSI option you’ll see that there is an entry for the empty partition entitled “pri/log 21.5GB” which we select:
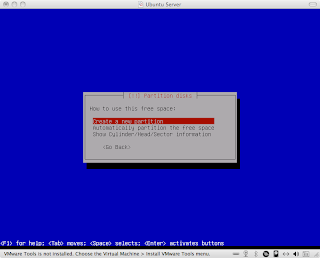
In the following screen select the “Create a new partition” option to create a new partition in the empty partition we just selected:

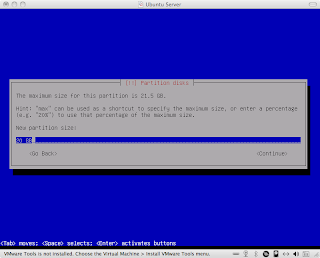
In the following screen downgrade the partition size from 21.5GB to 20GB. The remaining size will be used for the swap partition soon.
Select “Primary” to make this the primary partition:

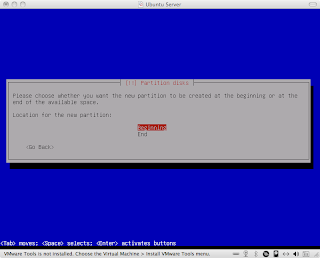
Allow the partition to be created at the “Beginning” of the available space:
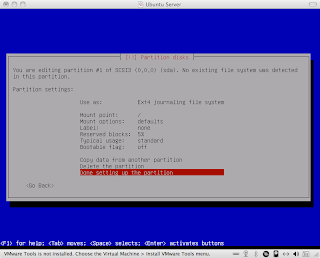
Select “Done setting up the partition” which completes the primary partition. Next we create the swap partition:
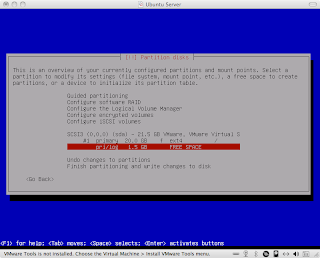
Returning to the main partition page, select the remaining “pri/log FREE SPACE” option, which will be used for the swap:
Again select the “Create a new partition” option:
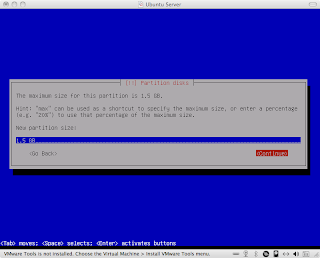
Take the default 1.5GB partition space next which will allocate the remaining free space to the swap:
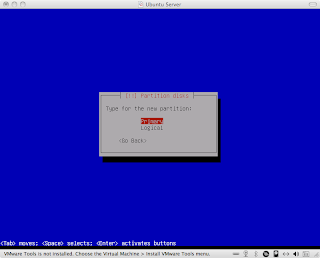
Again make this a Primary partition:
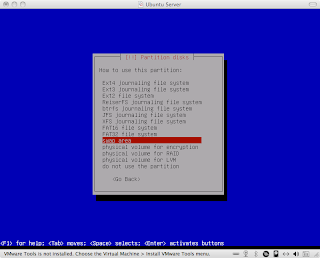
Select the “Use as” option as we want to change what the partition is used for:
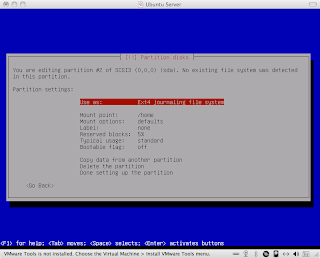
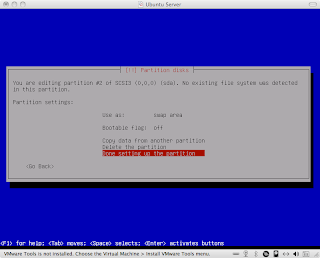
Select “swap area” when prompted “How to use this partition”:
Then finally “Done setting up this partition”
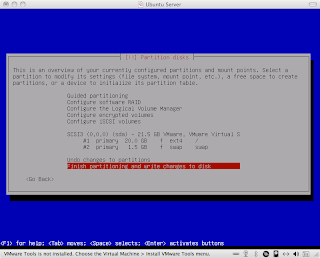
Returning to the partitions screen select “Finish partitioning and write changes to disk”:
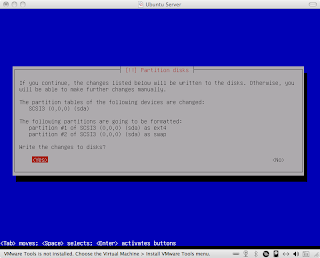
A final prompt warning you on your changes will display, select Yes:
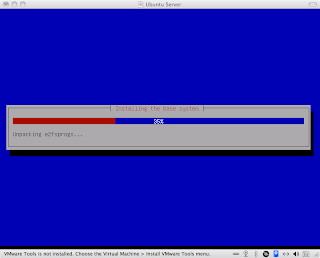
At this point the installer will start copying and configuring files:
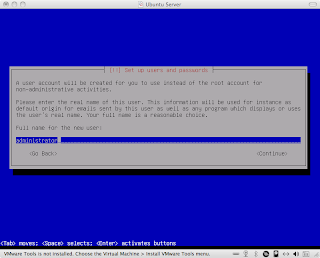
At the “Set up users and passwords” screen you have the chance to configure the primary none-root user. The first page prompts you for the user’s name, not the account name. However they can be the same. As seen in this screenshot “administrator” is entered:
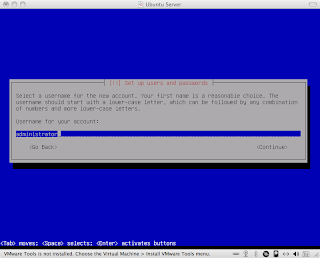
Next screen you enter the actual user account name, again “administrator” is entered in this screenshot:
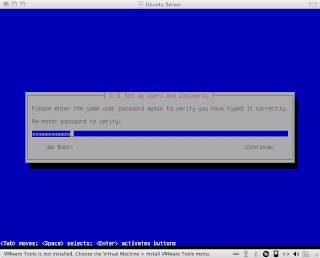
Over 2 screens you’ll be asked to enter and confirm a password for the new account:
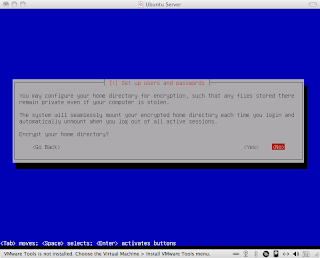
Choose not to encrypt the home directory:
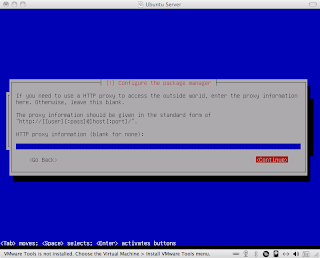
Only if you have a HTTP proxy between the internet and the Mac set the following options, otherwise just select Continue. The install requires access to the internet so it’s essential this is configured if required:
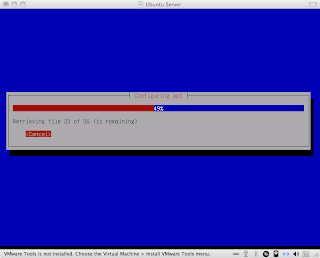
Now the installer will download and install additional files:
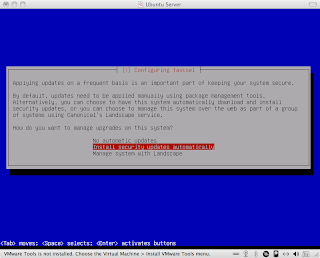
Select your preference at the screen prompting you how to apply security updates:
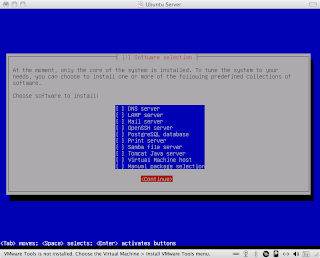
At the software selection page, as we want this to be a very small server install just to run Oracle XE, leave the software package selection undone:
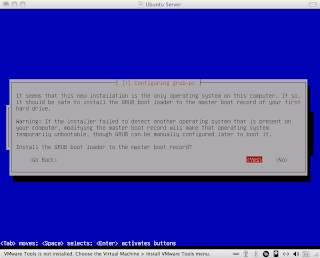
At the GRUB Boot prompt select Yes:
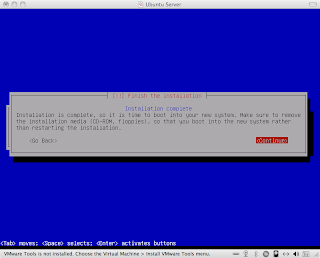
Hurray!… the installation is complete:
On a reboot the VM will display the Ubuntu command line login:
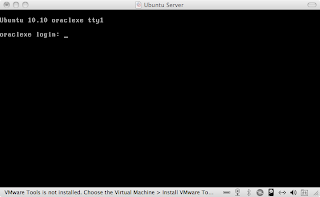
On logging in using the administrator account created in the previous steps, force the Ubuntu Server to update itself using the APT package installer via the following command:
sudo apt-get update && sudo apt-get dist-upgradeWhen prompted press Y
Finally reboot the server:
sudo shutdown –r nowInstall VMWare ToolsHere we depart from Ted's instructions. The Ubuntu Community
documentation provides under the "Installing from Ubuntu package from VM-tools" heading the instructions for installing the VMWare Tools. A number of prescribed methods didn't work, including those requiring the VMWare Tools to be mounted via a virtual cdrom.
On logging in again as administrator, enter the following commands. Note the third command; as we've installed a UI-less Ubuntu Server we use this specific command (the Ubuntu documentation lists 2 options):
sudo apt-get install linux-headers-virtual
sudo apt-get install --no-install-recommends open-vm-dkms
sudo apt-get install --no-install-recommends open-vm-toolsInstalling Oracle XEFirst login as administrator and install the prerequisite libraries and packages:
sudo aptitude install libaio-dev
sudo apt-get install bcNote that there appears to be some documentation around that indicates if Oracle XE is installed under Ubuntu 64bit, there are additional prerequisite libraries that must be installed including "bc" and "ia32-libs".
In the next step I had significant issues in using the usual method that most others used to download Oracle XE. As described in Ted's instructions, the typical manner is to download and Oracle XE is to add an entry to your /etc/apt/sources.list, use wget to retrieve the GPG key for the Oracle XE package and install it the APT repository, then finally download Oracle XE using APT.
Instead I came up with the following solution.
Via my browser I discovered the URL of the Oracle XE i386 deb package from the
OTN web page was as follows:
http://download.oracle.com/otn/linux/oracle10g/xe/10201/oracle-xe_10.2.0.1-1.0_i386.debStill logged in as administrator, issue the following command changing the username and password to match your OTN username and password:
(Post edit: It appears the wget command can't deal with the licence prompt the Oracle website asks for. To solve this, in your Mac and your favourite browser, access the following
page and accept the license condition. This will set your IP up to be allowed to download the software, such that both your Mac and the VMWare session can download the .deb file. Obviously another option is to download the .deb file onto your Mac, and then access it from your VMWare session)
wget --user=(username) --password=(password) http://download.oracle.com/otn/linux/oracle10g/xe/10201/oracle-xe_10.2.0.1-1.0_i386.debThis will download the XE .deb file. Once completed we can install the .deb file using dpkg (more information on .deb files and dpkg can be found via Chris Buckridge's
page):
sudo dpkg -i oracle-xe_10.2.0.1-1.0_i386.debEnsure to complete the usermod step next otherwise the administrator user will not be given correct privileges to install and start the database after a reboot:
(Post edit: there's a mistake in my notes here. Either the following command must be entered now, or, after the oracle-xe configure line next. Without reinstalling the whole VM it's currently hard for me to check this)
sudo usermod -g dba administratorThe next command configures and installs the database:
sudo /etc/init.d/oracle-xe configureAt the prompts:
1) Enter a port for Apex, the default being 8080
2) Enter a port for the Oracle Listener, the default being 1521.
3) Enter a password for the SYS/SYSTEM database accounts.
4) When prompted enter Y to allow Oracle XE to be started with the VM boots.
For reference /etc/default/oracle-xe is the configuration file which stores these options.
Once completed, edit the following file via or similar:
vi ~/.bashrcAt the end of the file enter the following:
ORACLE_HOME=/usr/lib/oracle/xe/app/oracle/product/10.2.0/server
PATH=$PATH:$ORACLE_HOME/bin
export ORACLE_HOME
export ORACLE_SID=XE
export PATHFinally we need to login to the database as system and allow remote access to the HTTP server:
sqlplus system/(password)
EXEC DBMS_XDB.SETLISTENERLOCALACCESS(FALSE);
quit;
Accessing the APEX homepage from the VM Host (not Guest)Finally to access the APEX homepage from the VM Host, on the guest issue the command "ifconfig" which will reveal the current IP of the VM guest, listed under the "eth0" "inet addr" entry, as example 192.168.197.131.
On the VM Host, return to your favourite browser and enter: http://192.168.197.131:8080/apex
..and the APEX home page should display. Ensure you can login using the SYSTEM account.
It's worth checking from a tool like JDeveloper installed under OSX that you can also access the database.
Voila.
 I don't normally write these sort of blog posts, but Oracle's been keen to let customers know how simple the upgrade of Oracle Forms 10g to 11g is. One of the major sticking points for customers is that this requires a move from Oracle Application Server and OC4J to WebLogic Server, a foreign application server platform to many traditional Oracle sites.


