As software applications grow, a common technique to reduce the complexity is to break the overall solution into separately built and deployed modules. This allows each component to be worked on independently without being overwhelmed with detail, though the cost of reassembling and building the application is the trade off for the added flexibility. When modules become reusable across applications the reassembly and build problem is exasperated and it becomes essential to track which version of each module is required against each application. Such problems can be reduced by the introduction of dependency management tools.
In the Java world there are a few well known tools for dependency management including
Apache Ivy and
Apache Maven. Strictly speaking Ivy is just a dependency management tool which integrates with
Apache Ant, while Maven is a set of tools of where dependency management is but just one of its specialities.
In the ADF world thanks to the inclusion of ADF Libraries (aka. modules) that can be shared across applications, dependency management is also a relevant problem. Recently I went through the exercise of including Apache Ivy into our JDeveloper 11g and Hudson mix for an existing set of applications. This blog post attempts to describe the configuration of Apache Ivy in context of our JDeveloper setup in order to assist others setting up a similar installation. The blog post will introduce a simplistic application (downloadable from
here) with 1 dependency to introduce the Ivy features, in very much an A-B-C style to assist the reader's learning.
Readers should be careful to note this post doesn't attempt to explain all the in's and out's of using Apache Ivy, just a successful configuration on our part. Readers are encouraged to seek out further resources to assist their learning of
Apache Ivy.
AssumptionsThis blog post assumes you understand the following concepts:
•
ADF Libraries•
Resource palette•
Apache Ant•
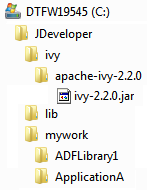
ojdeployIn the beginning there was... ah... ApplicationATo start out with our overall application contains one JDeveloper application workspace known as ApplicationA, installed under C:/JDeveloper/mywork as follows:
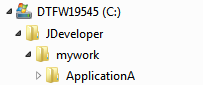
ApplicationA initially has no dependencies and can be built and run standalone.
Within the application we create a separate project entitled "Build" with an Ant build scripts entitled "pre-ivy.build.xml" to build our application using
ojdeploy as follows:
<?xml version="1.0" encoding="UTF-8" ?>
<project xmlns="antlib:org.apache.tools.ant" name="Build" basedir=".">
  <property name="jdev.ojdeploy.path" value="C:\java\jdeveloper\JDev11gBuild6081\jdeveloper\jdev\bin\ojdeploy.exe"/>
  <property name="jdev.ant.library" value="C:\java\jdeveloper\JDev11gBuild6081\jdeveloper\jdev\lib\ant-jdeveloper.jar"/>
  <target name="Build">
    <taskdef name="ojdeploy" classname="oracle.jdeveloper.deploy.ant.OJDeployAntTask" uri="oraclelib:OJDeployAntTask"
             classpath="${jdev.ant.library}"/>
    <ora:ojdeploy xmlns:ora="oraclelib:OJDeployAntTask" executable="${jdev.ojdeploy.path}"
                  ora:buildscript="C:\Temp\build.log" ora:statuslog="C:\Temp\status.log">
      <ora:deploy>
        <ora:parameter name="workspace" value="C:\JDeveloper\mywork\ApplicationA\ApplicationA.jws"/>
        <ora:parameter name="profile" value="ApplicationA"/>
        <ora:parameter name="outputfile" value="C:\JDeveloper\mywork\ApplicationA\deploy\ApplicationA"/>
      </ora:deploy>
    </ora:ojdeploy>
  </target>
</project>
(Note the jdev.ojdeploy.path & jdev.ant.library properties that map to your JDeveloper installation. You will need to change these to suit your environment. This will need to be done for both ApplicationA and the following ADFLibrary1)
And then ApplicationA begat ADFLibrary1Now we'll create a new task flow in a separate application workspace known as ADFLibrary1 which ApplicationA is dependent on:
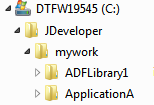
We add an ADF Library JAR deployment profile to ADFLibrary1's ViewController project to generate ADFLibrary1.jar to:
C:\JDeveloper\mywork\ADFLibrary1\ViewController\deploy\adflibADFLibrary1.jar
Similar to ApplicationA we add a Build project to our application workspace and a pre-ivy.build.xml Ant build script using ojdeploy:
<?xml version="1.0" encoding="UTF-8" ?>
<project xmlns="antlib:org.apache.tools.ant" name="Build" basedir=".">
  <property name="jdev.ojdeploy.path" value="C:\java\jdeveloper\JDev11gBuild6081\jdeveloper\jdev\bin\ojdeploy.exe"/>
  <property name="jdev.ant.library" value="C:\java\jdeveloper\JDev11gBuild6081\jdeveloper\jdev\lib\ant-jdeveloper.jar"/>
  <target name="Build">
    <taskdef name="ojdeploy" classname="oracle.jdeveloper.deploy.ant.OJDeployAntTask" uri="oraclelib:OJDeployAntTask"
             classpath="${jdev.ant.library}"/>
    <ora:ojdeploy xmlns:ora="oraclelib:OJDeployAntTask" executable="${jdev.ojdeploy.path}"
                  ora:buildscript="C:\Temp\build.log" ora:statuslog="C:\Temp\status.log">
      <ora:deploy>
        <ora:parameter name="workspace" value="C:\JDeveloper\mywork\ADFLibrary1\ADFLibrary1.jws"/>
        <ora:parameter name="project" value="ViewController"/>
        <ora:parameter name="profile" value="ADFLibrary1"/>
        <ora:parameter name="outputfile" value="C:\JDeveloper\mywork\ADFLibrary1\ViewController\deploy\ADFLibrary1"/>
      </ora:deploy>
    </ora:ojdeploy>
  </target>
</project>
From here we want to attach ADFLibrary1.jar to ApplicationA's ViewController project. Overtime we might have many JARs we want to attach, so rather than mapping to several different deploy directories under each ADF Library application workspace, we'll assume the libraries are instead available under a central "lib" directory as follows:
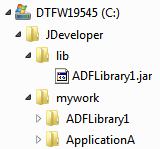
Experienced readers will know to setup a
Resource Palette "File Connection" to map to C:\JDeveloper\mywork\lib then simply add the JARs from the palette.
Adding Apache IvyAt this point we have a rudimentary form of dependency management setup, where a logical version 1 of ApplicationA has attached a logical version 1 of ADFLibrary1 through the use of the ADF Library JAR being attached to ApplicationA's ViewController project. Note the word "rudimentary". Currently there is no way to track versions. If we have separate versions of ApplicationA dependent on separate versions of ADFLibrary1, developers have to be very careful to check out and build the correct versions, and there's nothing inherently obvious in the generated JAR file names to gives us an idea of what versions are being used.
Let's introduce Apache Ivy into the mix with this simplistic dependency model as a basis for learning, to see how Ivy solves the versioning dependency issue.
Adding ivy.xml to each moduleIvy requires that each module have an
ivy.xml. The ivy.xml file among other things describes for each module:
a) The module name
b) The version of the module
c) Determines what artefacts the module publishes
d) Track the module's dependencies including the version of the dependencies
For our existing ADFLibrary1 we'll add an ivy.xml file to our Build project containing the following details:
<?xml version="1.0" encoding="UTF-8"?>
<ivy-module version="2.0">
  <info organisation="sage" module="ADFLibrary1" revision="1"/>
  <configurations>
    <conf name="jar" description="Java archive"/>
    <conf name="ear" description="Enterprise archive"/>
  </configurations>
  <publications>
    <artifact name="ADFLibrary1" conf="jar" ext="jar"/>
  </publications>
  <!-- <dependencies> There are no dependencies for this module <dependencies/> -->
</ivy-module>
Of note:
a) The module name in the
<info> tag
b) The revision/version number in the <info> tag
c) The publication of an ADF Library jar in the
<publications> tag
d) And that this module is not dependent on any other modules through the commented out
<dependencies> tag
(You might also note the <configurations> tag.
Configurations define the type of artefacts we can possible generate for the module. In this case we're creating an ADF Library "JAR", but alternatively for example we could produce a WAR or EAR file or some other sort of artefact. For purposes of this blog post we'll keep this relatively simple and just stick to JARs and EARs).
For our existing ApplicationA its ivy.xml file under the Build project will look as follows:
<?xml version="1.0" encoding="UTF-8"?>
<ivy-module version="2.0">
  <info organisation="sage" module="ApplicationA" revision="1"/>
  <configurations>
    <conf name="jar" description="Java archive"/>
    <conf name="ear" description="Enterprise archive"/>
  </configurations>
  <publications>
    <artifact name="ApplicationA" conf="ear" ext="ear"/>
  </publications>
  <dependencies>
    <dependency org="sage" name="ADFLibrary1" rev="1">
      <artifact name="ADFLibrary1" ext="jar"/>
    </dependency>
  </dependencies>
</ivy-module>
Of note:
a) The module name ApplicationA in the
<info> tag
b) The revision/version number 1 in the <info> tag
c) The publication of an EAR in the
<publications> tag
d) And of most importance, a
dependency of ADFLibrary1, specifically release/version 1.
It's this last point that is most important as not only does it track the dependencies between modules (which truthfully JDev was already doing for us) but the ivy.xml file also tracks the version dependency, namely ApplicationA release/version 1 is dependent on version/release 1 of ADFLibrary1.
Apache Ivy RepositoryIn the previously described application configuration we were assuming the build of ApplicationA and ADFLibrary1 was all on the same developer machine. It's relatively simply for 1 developer to copy the JARs to the correct location to satisfy the dependencies. Yet in a typical development environment there will be multiple developers working on different modules across different developer machines. Moving JARs between developer PCs becomes problematic. We really need some sort of developer repository to share the modules archives.
At this point we introduce an Apache Ivy repository into our solution. Simplistically the Ivy repository is a location where developers can publish JARs to, and other developers when building an application with a dependency, can download the dependencies from.
Ivy supports different types of repositories which are documented under
Resolvers in the Ivy documentation. For purposes of this blog post we'll use the simplest repository type of "FileSystem".
In order to make use of the FileSystem Ivy repository all developers must have access to a file (typically called) ivysettings.xml. This file defines for Ivy where the repository resides among other
settings. How you distribute this file to developers is up to you, maybe it's located on a shared network location, maybe a copy checked out to a common local location. For purposes of this blog post we'll assume it resides on every developer's machine under C:\JDeveloper\ivy:
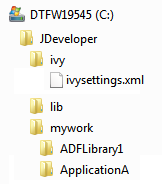
The following reveals the contents of a possible ivysettings.xml file:
<ivysettings>
  <property name="ivy.repo.dir" value="C:\JDeveloper\ivy\repositories\development"/>
  <resolvers>
    <chain>
      <filesystem name="repository">
        <ivy pattern="${ivy.repo.dir}/[module]/ivy[module]_[revision].xml" />
        <artifact pattern="${ivy.repo.dir}/[module]/[type][artifact]_[revision].[ext]"/>
      </filesystem>
    </chain>
  </resolvers>
</ivysettings>
Points to consider:
1) Note the ivy.repo.dir property. Typically this would point to your own //SomeServer/YourRepositoryLocation which all developers can access on your local network. For the purposes of this blog post, in order to give readers a single zip file that they can download and use, I've changed this setting to instead locate the repository at C:\JDeveloper\ivy\repositories\development. This certainly *isn't* a good location for a shared repository, but one that is workable for demonstration purposes.
2) The
<resolvers> <chain> defines the list of repositories for Ivy to publish to or download dependencies from. In this case we've only configured one repository, but there's nothing stopping you having a series of repositories.
3) The <ivy> subtag of the
<filesystem> tag defines how Ivy will store and search for it's own metadata files in the repository, of which it stores information such as the module name, versions and more that is essentially copied from your ivy.xml files.
4) The <artifact> tag defines how Ivy will store and search for the actual artefacts you generate (such as the ADF Library JARs) in the repository.
With regards the last 2 points it's best to leave the patterns as the default, as in the end the repository can be treated as a black box. You don't really care how it works, just as long as Ivy allows you to publish and retrieve files from the repository.
Configuring Ant to *understand* IvyWith the ivy.xml and ivysettings.xml files in place, we now need to configure our Ant build scripts to interpret the settings and work with our repository during builds.
First we
download the Apache Ivy and install into a location each developer's machine can access. This blog posts assumes
Ivy v2.2.0 and that the associated ivy-2.2.0.jar has been unzipped to C:\JDeveloper\ivy\apache-ivy-2.2.0:
Next we modify our existing build scripts for each module. In the build.xml file for *both* ADFLibrary1 and ApplicationA we insert the following code:
(Note in the downloadable application this code resides in build.xml, not pre-ivy.build.xml which was documented earlier in this blog post).
<property name="ivy.default.ivy.user.dir" value="C:\JDeveloper\ivy"/>
<property name="ivy.default.ivy.lib.dir"  value="C:\JDeveloper\lib"/>
<path id="ivy.lib.path">
  <fileset dir="C:\JDeveloper\ivy\apache-ivy-2.2.0" includes="*.jar"/>
</path>
<taskdef resource="org/apache/ivy/ant/antlib.xml" uri="antlib:org.apache.ivy.ant" classpathref="ivy.lib.path"/>
<ivy:configure file="C:\JDeveloper\ivy\ivysettings.xml"/>
<ivy:info file="./ivy.xml"/>
Items to note:
1) Setting the property ivy.default.ivy.user.dir changes the default location under which Ivy stores local copies of the data downloaded from the repository.
2) Setting the property ivy.default.ivy.lib.dir defines the location where the JAR files should be ultimately delivered for dependent modules to make use of.
3) The
<ivy:configure> tag tells Ivy where the ivysettings.xml file is located which includes the configuration information about the repositories.
4) The
<ivy:info> tag tells Ivy where the current modules ivy.xml file is located.
Configuring Ant to *use* IvyWith the previous Ivy setup we're now ready to start building using Ivy via Ant.
Let's consider our goals. What we want to first do is build and then publish ADFLibrary1 to the Ivy repository. Then subsequently for ApplicationA we want to download ADFLibrary1 from the Ivy repository, then build ApplicationA.
To achieve the first goal, we already have a Build Ant target in the ADFLibrary1 build.xml. So we just need to add another target "Publish" which will take the artefacts generated from the Build target as follows:
<target name="Publish">
  <ivy:publish resolver="repository" overwrite="true" pubrevision="${ivy.revision}" update="true">
    <ivy:artifacts pattern="../ViewController/deploy/[artifact].[ext]"/>
  </ivy:publish>
</target>
Items to note:
1) The
<ivy:publish> tag that says which resolver (ie. which repository) to publish too, what to do if the exact file and revision already exists in the repository, and what revision/version to publish the file as. With regards the ${ivy.revision} this variable is derived from the ADFLibrary1's ivy.xml file.
2) The <artifacts> tag which tells the publish command where to find the artifact to publish.
3) Because of the <artifacts> tag there's a dependency that the module has already been built. This could be easily catered for in the overall build script by making an <antcall> to the Build target at the start of the <ivy:publish> tag, but for purposes of simplicity this change hasn't been made for this blog post.
At this point let's see what outputs we see if we run the Build and Publish scripts. First when we run the Build target the JDeveloper log window reports:
Buildfile: C:\JDeveloper\mywork\ADFLibrary1\Build\build.xml
[ivy:configure] :: Ivy 2.2.0 - 20100923230623 :: http://ant.apache.org/ivy/ ::
[ivy:configure] :: loading settings :: file = C:\JDeveloper\ivy\ivysettings.xml

Build:
[ora:ojdeploy] ----build file----
[ora:ojdeploy] <?xml version = '1.0' standalone = 'yes'?>
[ora:ojdeploy] <ojdeploy-build>
[ora:ojdeploy]   <deploy>
[ora:ojdeploy]     <parameter name="workspace" value="C:\JDeveloper\mywork\ADFLibrary1\ADFLibrary1.jws"/>
[ora:ojdeploy]     <parameter name="project" value="ViewController"/>
[ora:ojdeploy]     <parameter name="profile" value="ADFLibrary1"/>
[ora:ojdeploy]     <parameter name="outputfile" value="C:\JDeveloper\mywork\ADFLibrary1\ViewController\deploy\ADFLibrary1"/>
[ora:ojdeploy]   </deploy>
[ora:ojdeploy]   <defaults>
[ora:ojdeploy]     <parameter name="statuslogfile" value="C:\Temp\status.log"/>
[ora:ojdeploy]   </defaults>
[ora:ojdeploy] </ojdeploy-build>
[ora:ojdeploy] ------------------
[ora:ojdeploy] 07/12/2011 1:31:42 PM oracle.security.jps.util.JpsUtil disableAudit
[ora:ojdeploy] INFO: JpsUtil: isAuditDisabled set to true
[ora:ojdeploy] 07/12/2011 1:31:43 PM oracle.jdevimpl.deploy.fwk.TopLevelDeployer prepareImpl
[ora:ojdeploy] INFO: ----  Deployment started.  ----
[ora:ojdeploy] 07/12/2011 1:31:43 PM oracle.jdevimpl.deploy.fwk.TopLevelDeployer printTargetPlatform
[ora:ojdeploy] INFO: Target platform is Standard Java EE.
[ora:ojdeploy] 07/12/2011 1:31:43 PM oracle.jdevimpl.deploy.common.ProfileDependencyAnalyzer deployImpl
[ora:ojdeploy] INFO: Running dependency analysis...
[ora:ojdeploy] 07/12/2011 1:31:43 PM oracle.jdeveloper.deploy.common.BuildDeployer build
[ora:ojdeploy] INFO: Building...
[ora:ojdeploy] Compiling...
[ora:ojdeploy] [1:31:45 PM] Successful compilation: 0 errors, 0 warnings.
[ora:ojdeploy] 07/12/2011 1:31:45 PM oracle.jdevimpl.deploy.common.ModulePackagerImpl deployProfiles
[ora:ojdeploy] INFO: Deploying profile...
[ora:ojdeploy] 07/12/2011 1:31:45 PM oracle.adfdt.controller.adfc.source.deploy.AdfcConfigDeployer deployerPrepared
[ora:ojdeploy] INFO: Moving WEB-INF/adfc-config.xml to META-INF/adfc-config.xml
[ora:ojdeploy]
[ora:ojdeploy] 07/12/2011 1:31:45 PM oracle.jdeveloper.deploy.jar.ArchiveDeployer logFileWritten
[ora:ojdeploy] INFO: Wrote Archive Module to file:/C:/JDeveloper/mywork/ADFLibrary1/ViewController/deploy/ADFLibrary1.jar
[ora:ojdeploy] 07/12/2011 1:31:45 PM oracle.jdevimpl.deploy.fwk.TopLevelDeployer finishImpl
[ora:ojdeploy] INFO: Elapsed time for deployment:  3 seconds
[ora:ojdeploy] 07/12/2011 1:31:45 PM oracle.jdevimpl.deploy.fwk.TopLevelDeployer finishImpl
[ora:ojdeploy] INFO: ----  Deployment finished.  ----
[ora:ojdeploy] Status summary written to /C:/Temp/status.log
At the beginning of the output you can see Ivy being initialized but at the moment it's mostly not used. From the output you can see the JAR being built by ojdeploy and placed under C:/JDeveloper/mywork/ADFLibrary1/ViewController/deploy.
Next when we run the Publish task the following output is produced:
Buildfile: C:\JDeveloper\mywork\ADFLibrary1\Build\build.xml
[ivy:configure] :: Ivy 2.2.0 - 20100923230623 :: http://ant.apache.org/ivy/ ::
[ivy:configure] :: loading settings :: file = C:\JDeveloper\ivy\ivysettings.xml

Publish:
[ivy:publish] :: publishing :: sage#ADFLibrary1
[ivy:publish]  published ADFLibrary1 to C:\JDeveloper\ivy\repositories\development/ADFLibrary1/jarADFLibrary1_1.jar
[ivy:publish]  published ivy to C:\JDeveloper\ivy\repositories\development/ADFLibrary1/ivyADFLibrary1_1.xml
Beyond the initial Ivy setup, of importance we can see the calls to <ivy:publish> pulling the JAR from the previous Build step to the repository. If we look at our C: drive where the repository is located we can indeed see files now sitting in the repository:
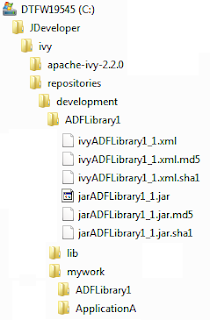
The different files are beyond the discussion here, but to say this is the structure Ivy has put into place.
At this point we've achieved our first goal of build and publishing the ADFLibrary1 to the Ivy repository. Let's more over to our second goal for ApplicationA where we want to download ADFLibrary1 from the Ivy repository, then build ApplicationA.
In order to do this we'll add a new target to the ApplicationA build.xml "Download_dependencies" as follows:
<target name="Download_dependencies">
  <ivy:cleancache/>
  <ivy:resolve/>
  <ivy:retrieve pattern="${ivy.default.ivy.lib.dir}/[artifact].[ext]" type="jar"/>
</target>
Of note:
1) The
<ivy:cleancache> tag clears the ${ivy.default.ivy.user.dir}\Cache of previously downloaded dependencies. This is only really necessary if when you're uploading dependencies you're not creating new versions, but rather overwriting an existing release. In this later case Ivy will in preference use the cached copy of the JAR rather than retrieving the updated JAR in the repository. Flushing the cache solves this issue as the JARs need to be downloaded each time.
2) The
<ivy:resolve> tag which loads the dependency metadata for the current module from the associated ivy.xml file, determines which artefacts to obtain from the repository and downloads them to the ${ivy.default.ivy.user.dir}\Cache directory on the local PC.
3) The
<ivy:retrieve> tag then searches the Cache directory for the required JAR files and places them in the location where the application expects to find them, namely C:\JDeveloper\lib
If we run this task we see in the logs:
Buildfile: C:\JDeveloper\mywork\ApplicationA\Build\build.xml
[ivy:configure] :: Ivy 2.2.0 - 20100923230623 :: http://ant.apache.org/ivy/ ::
[ivy:configure] :: loading settings :: file = C:\JDeveloper\ivy\ivysettings.xml

Download_dependencies:
[ivy:resolve] :: resolving dependencies :: sage#ApplicationA;1
[ivy:resolve]  confs: [jar, ear]
[ivy:resolve]  found sage#ADFLibrary1;1 in repository
[ivy:resolve] downloading C:\JDeveloper\ivy\repositories\development\ADFLibrary1\jarADFLibrary1_1.jar ...
[ivy:resolve] .. (6kB)
[ivy:resolve] .. (0kB)
[ivy:resolve]  [SUCCESSFUL ] sage#ADFLibrary1;1!ADFLibrary1.jar (0ms)
[ivy:resolve] :: resolution report :: resolve 109ms :: artifacts dl 0ms
 ---------------------------------------------------------
 |      |            modules            ||   artifacts   |
 | conf | number| search|dwnlded|evicted|| number|dwnlded|
 ---------------------------------------------------------
 | jar  |   1   |   1   |   1   |   0   ||   1   |   1   |
 | ear  |   1   |   1   |   1   |   0   ||   1   |   1   |
 ---------------------------------------------------------
[ivy:retrieve] :: retrieving :: sage#ApplicationA
[ivy:retrieve]  confs: [jar, ear]
[ivy:retrieve]  1 artifacts copied, 0 already retrieved (6kB/0ms)
Beyond the initial configuration of Ivy, in the output you can see the &ivy;resolve> tag resolving the dependency of ApplicationA on ADFLibrary1 version 1, then downloading the file to the cache. Finally the <retrieve> tag retrieves the file from the cache and copies it to the local lib directory (though this isn't that obvious from the logs).
If you now Build ApplicationA you will see it compiles correctly. To check it doesn't build when the ADFLibrary1.jar is not sitting in the C:\JDeveloper\lib directory, delete the JAR and rebuild ApplicationA.
Making and building with new revisionsOvertime your modules will include new revisions. You will of course be checking these changes in and out of your version control system such as Subversion. How do you cater for the new versions with regards to Ivy?
Imagine the scenario where ApplicationA release 3 is now dependent on ADFLibrary1 revision 6. This requires two simple changes.
Firstly in the ADFLibrary1 ivy.xml, replace the revision number under the <info> tag to 6, build and publish.
Second in ApplicationA's ivy.xml, update it's revision number to 3, then in the <dependencies> tag update the ADFLibrary1 dependency's revision number to 6. Forthright when you download the dependencies for ApplicationA revision 3, it will download revision 6 from the repository.
ConclusionAt this point we have all the moving parts to make use of Ivy with JDeveloper and ADF to implement a dependency management solution. While the example is contrived, it shows the use of:
1) The ivy.xml file to define each module, what it publishes and what it depends on
2) The ivysettings.xml file to define the location of the shared repository
3) The Ivy Ant tasks for publishing modules to the repository, as well as downloading modules from the repository
If I have time I will write a different blog post to show how transitive dependencies work in Ivy. The nice thing about Ivy is it handles these automagically so there's not much to configure, just explain a working example.
Beyond this there really isn't that much else to explain, working out the nuances of Ivy takes around a week, retrofitting it into your environment takes longer, but beyond that Ivy is pretty simple in that it does one thing and it does one thing well.
Finally note I'm not advocating Apache Ivy over Apache Maven with this post, ultimately this post simply documents how to use Ivy with JDeveloper, and readers need to make their own choice which tool if any to use. Future versions of JDeveloper (See the Maven integration section in the following blog
post) are scheduled to have improved Maven integration so readers should take care not to discount Maven as an option.
ErrataThis was tested against JDev 11.1.2.1.0 and 11.1.1.4.0, but in essence should run against any JDev version with Ant support.


